
D365 Checklists · Admin
Add Checklists to Entity Forms
Being updated. This article was recovered from the old Help Center. Its steps and screenshots show the older Dynamics 365 interface.
It’s simple for a System Administrator (or Customizer) to setup and implement Checklists in your organization. If they are familiar with adding Web Resources to Entity Forms it’s a breeze, but also only a few steps for those not initiated. As a high-level overview:
- Pick an Entity record type you’d like to use Checklists on (System or Custom entity)
- Create a new Multi-Line Text Field on your entity (eg new_checklistdata)
Tip: Increase the Character Limit of the field to 20,000 or more. This is where all the data will be stored, and can be increased later if needed
- Add your new Multi-Line Text Field onto the entity Form (make it Not Visible)
- Add the d365_checklists.html Web Resource to the entity Form
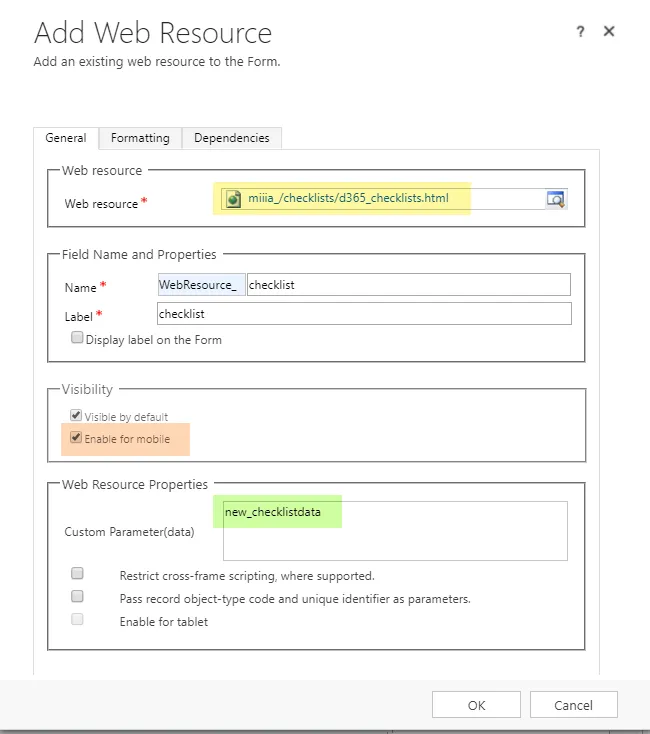
- Set a Custom Parameter for the Web Resource using the field name where the data will be stored eg. “new_checklistdata”
- Select Enable for mobile if you wish the Checklist Web Resource to be available via mobile apps
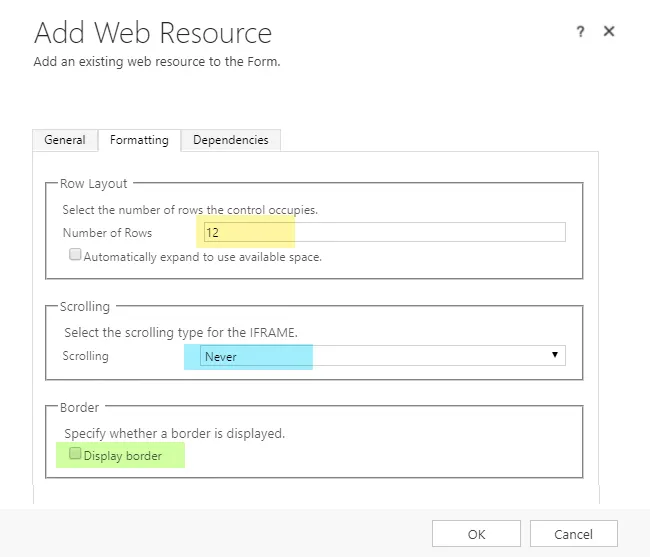
For better visual results, select a few options from the Formatting Tab of the Add Web Resource dialog also:
- Number of Rows
- Scrolling
- Display Border
- Publish All Changes, you’re done!